

本記事はアフィリエイト広告(PR)を含みます
前回の記事から一部抜粋になります。
Google ColaboratoryでGoogle Driveをマウントし、Google Drive内のファイルにアクセスする方法についてまとめました。

1. Google Colaboratoryについて
Webブラウザ上でPythonコードの記述・実行ができるサービスです。インストール不要でGoogleアカウントがあれば無料で使用することができます。
また、1日12時間という制限付きですがGPUを使用することもできるので手軽にDeep Learningの学習を試すことも出来ます。
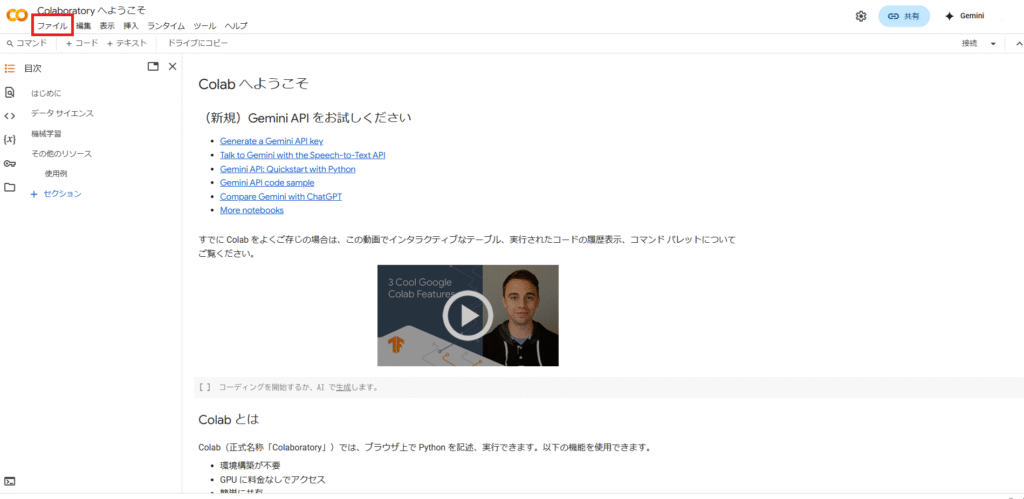
まずは以下のリンクからGoogle Colaboratoryにアクセスします(Googleアカウントのログイン推奨)

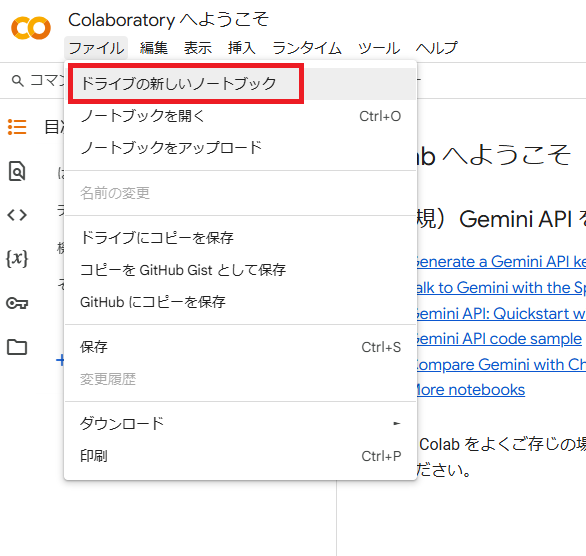
アクセスすると以下のようなページが表示されるので、新規で開く場合は左上の「ファイル」から「ドライブの新しいノートブック」を選択します。
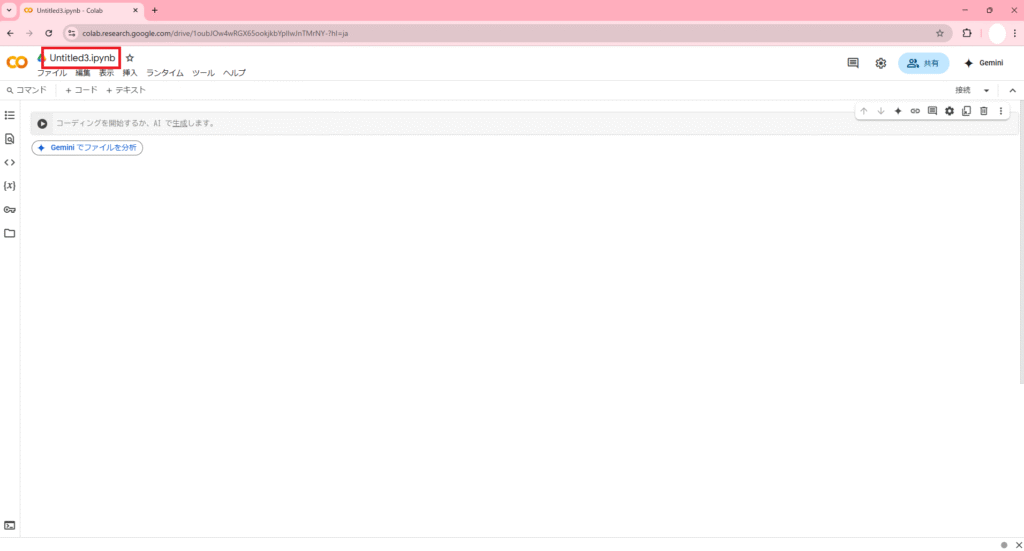
新規のノートブックが作成されると、最初は「Untitled.ipynb」のようなタイトルになっているので任意のタイトルに変更できます。今回は「テスト.jpynb」にしました。

一旦何かコードを書いて実行してみます。
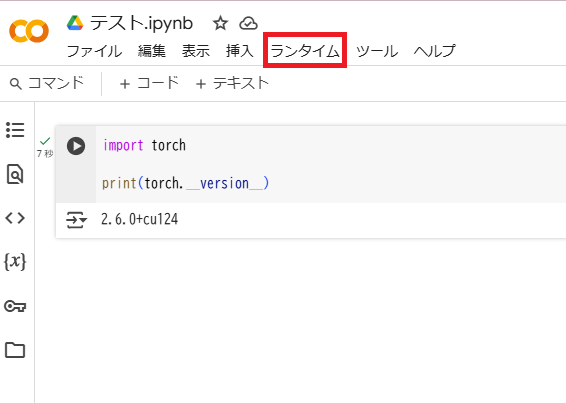
コードを書いたら左側の実行ボタンを押すとそのまま実行することができます。以下はPyTorchのバージョンを確認するコードです。
なおGoogle ColabではインストールしなくてもPyTorch(最新バージョン)が使用できるようです。
import torch

print(torch.__version__)
2. GPU設定
次にGPUの設定を行います。
まずタスクバーの「ランタイム」から「ランタイムのタイプを変更」を選択します。
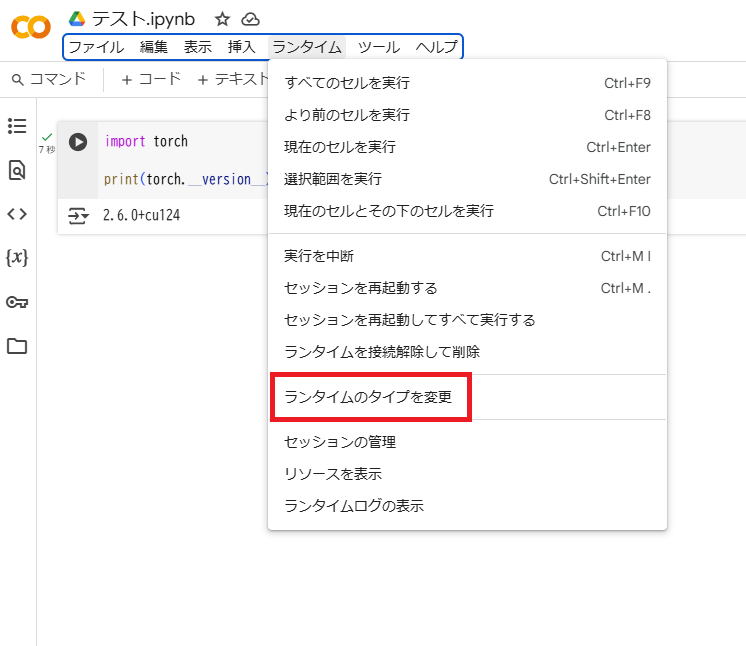
デフォルトではCPUになっているので「T4 GPU」を選択します。
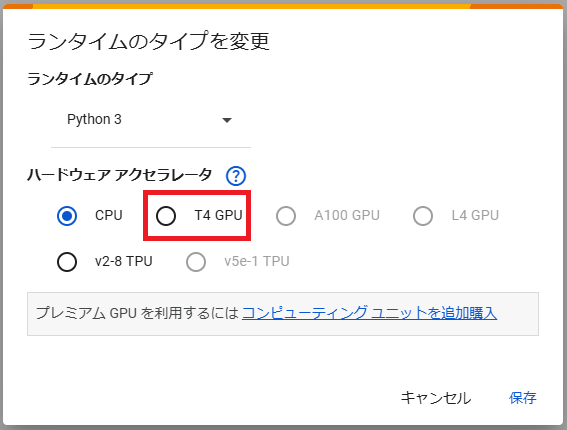
GPUを選択すると以下の画面が表示されます。ランタイムのタイプを変更すると設定がリセットされるので最初に変更しておきましょう。
ここは問題がなければそのままOKを押します。
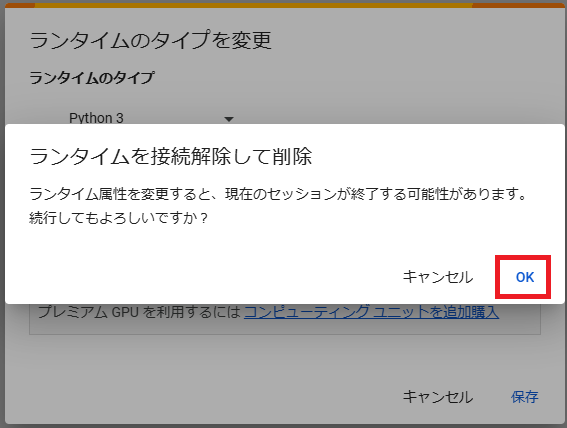
変更したら「保存」を押します。

GPUの設定が有効になっているか確認してみます。
torch.cuda.is_available()がTrueになっていれば問題なく設定できています。
import torch

print(torch.__version__)
print(torch.cuda.is_available())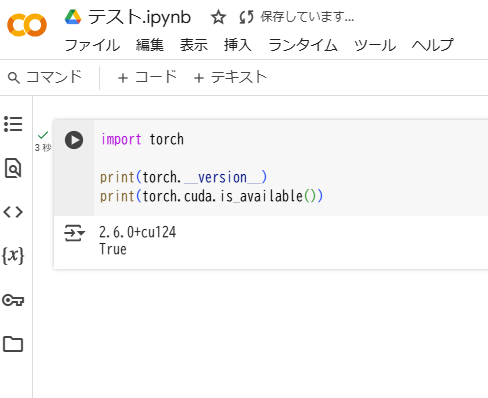
3. Google Driveをマウント
次にGoogle Driveをマウントします。
左のメニューからフォルダアイコンを選択し、赤枠をクリックしてGoogle Driveをマウントします。
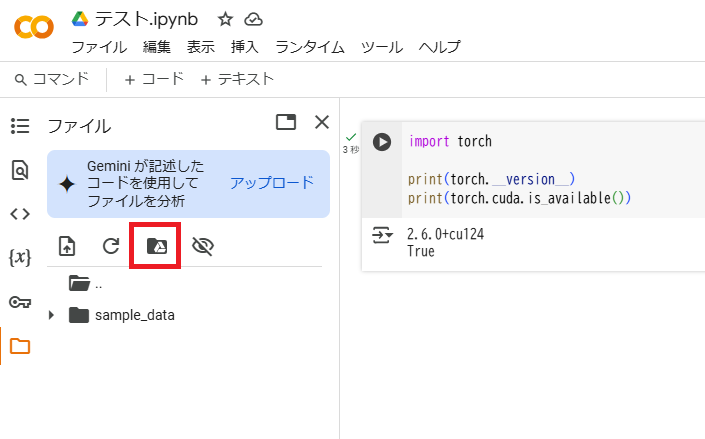
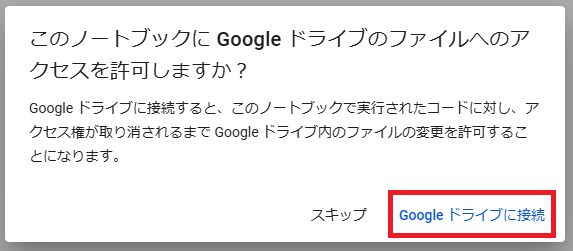
なお、マウントを行うにはGoogle Driveへのアクセスを許可する必要があります。
問題がなければ「Googleドライブに接続」を選択します。
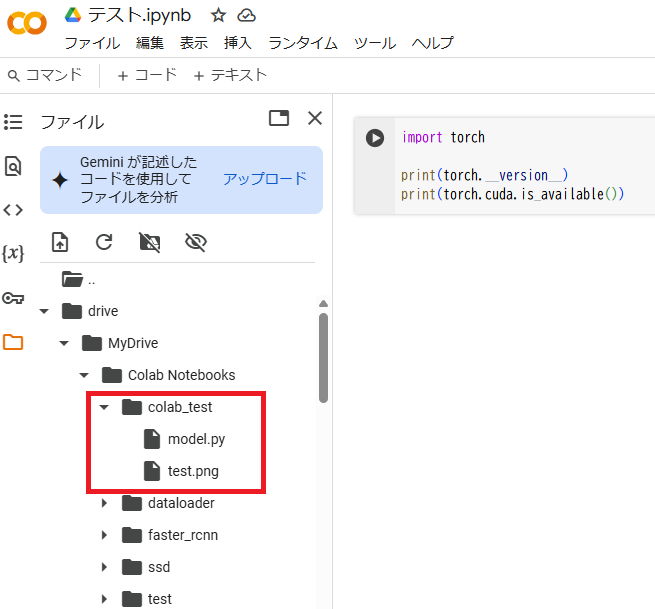
マウントが成功するとフォルダに「drive」が追加されます。

なお、作成したノートブックは「drive/MyDrive/Colab Notebooks」の中に保存されます。

Colab Notebooksの中に「colab_test」フォルダを作成し、「model.py」と「test.png」を作成しました。今回はこれらのファイルにアクセスしてみます。
torchvisionに実装されているVGG16を返す関数
import torchvision

def get_model():
return torchvision.models.vgg16(pretrained=False)4. 動作確認
まず、ファイルにアクセスする前に作業フォルダを変更する必要があります。左上のタブから「コード」を押して以下のコマンドを入力し、実行します。
cd /content/drive/MyDrive/Colab Notebooks
そして以下を実行し、VGG16のモデルとtest.pngを表示してみます。
import torch
from PIL import Image
from colab_test import model

net = model.get_model()

print(net)
img = Image.open('colab_test/test.png')
img
実行結果は以下の通りです。
/usr/local/lib/python3.11/dist-packages/torchvision/models/_utils.py:208: UserWarning: The parameter 'pretrained' is deprecated since 0.13 and may be removed in the future, please use 'weights' instead.
  warnings.warn(
/usr/local/lib/python3.11/dist-packages/torchvision/models/_utils.py:223: UserWarning: Arguments other than a weight enum or `None` for 'weights' are deprecated since 0.13 and may be removed in the future. The current behavior is equivalent to passing `weights=None`.
  warnings.warn(msg)
VGG(
  (features): Sequential(
    (0): Conv2d(3, 64, kernel_size=(3, 3), stride=(1, 1), padding=(1, 1))
    (1): ReLU(inplace=True)
    (2): Conv2d(64, 64, kernel_size=(3, 3), stride=(1, 1), padding=(1, 1))
    (3): ReLU(inplace=True)
    (4): MaxPool2d(kernel_size=2, stride=2, padding=0, dilation=1, ceil_mode=False)
    (5): Conv2d(64, 128, kernel_size=(3, 3), stride=(1, 1), padding=(1, 1))
    (6): ReLU(inplace=True)
    (7): Conv2d(128, 128, kernel_size=(3, 3), stride=(1, 1), padding=(1, 1))
    (8): ReLU(inplace=True)
    (9): MaxPool2d(kernel_size=2, stride=2, padding=0, dilation=1, ceil_mode=False)
    (10): Conv2d(128, 256, kernel_size=(3, 3), stride=(1, 1), padding=(1, 1))
    (11): ReLU(inplace=True)
    (12): Conv2d(256, 256, kernel_size=(3, 3), stride=(1, 1), padding=(1, 1))
    (13): ReLU(inplace=True)
    (14): Conv2d(256, 256, kernel_size=(3, 3), stride=(1, 1), padding=(1, 1))
    (15): ReLU(inplace=True)
    (16): MaxPool2d(kernel_size=2, stride=2, padding=0, dilation=1, ceil_mode=False)
    (17): Conv2d(256, 512, kernel_size=(3, 3), stride=(1, 1), padding=(1, 1))
    (18): ReLU(inplace=True)
    (19): Conv2d(512, 512, kernel_size=(3, 3), stride=(1, 1), padding=(1, 1))
    (20): ReLU(inplace=True)
    (21): Conv2d(512, 512, kernel_size=(3, 3), stride=(1, 1), padding=(1, 1))
    (22): ReLU(inplace=True)
    (23): MaxPool2d(kernel_size=2, stride=2, padding=0, dilation=1, ceil_mode=False)
    (24): Conv2d(512, 512, kernel_size=(3, 3), stride=(1, 1), padding=(1, 1))
    (25): ReLU(inplace=True)
    (26): Conv2d(512, 512, kernel_size=(3, 3), stride=(1, 1), padding=(1, 1))
    (27): ReLU(inplace=True)
    (28): Conv2d(512, 512, kernel_size=(3, 3), stride=(1, 1), padding=(1, 1))
    (29): ReLU(inplace=True)
    (30): MaxPool2d(kernel_size=2, stride=2, padding=0, dilation=1, ceil_mode=False)
  )
  (avgpool): AdaptiveAvgPool2d(output_size=(7, 7))
  (classifier): Sequential(
    (0): Linear(in_features=25088, out_features=4096, bias=True)
    (1): ReLU(inplace=True)
    (2): Dropout(p=0.5, inplace=False)
    (3): Linear(in_features=4096, out_features=4096, bias=True)
    (4): ReLU(inplace=True)
    (5): Dropout(p=0.5, inplace=False)
    (6): Linear(in_features=4096, out_features=1000, bias=True)
  )
)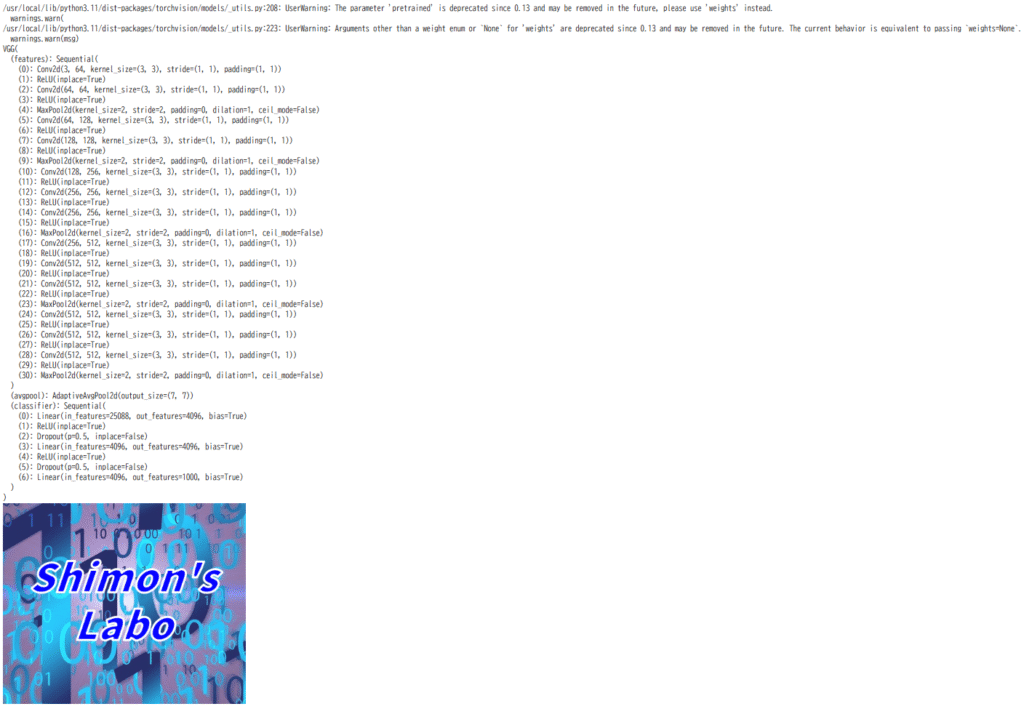
Google Drive内のファイルにアクセスし、正常に実行できたことが確認できました。
今回は以上です。
5. 参考文献・参考サイト
・Google ColabでのDriveへのマウントとディレクトリの変更-Pythonで始める画像処理
https://python-debut.blogspot.com/2020/04/google-colabdrive.html


コメント